

Serverless Password Manager using AWS KMS and Amazon DynamoDB
By Muhammad Abutahir


We often come across situations where we have to create a new account for the websites we use, sometimes we use them frequently, and sometimes not, the problem is we can’t remember the password every time and we often end up resetting the password. This can become too frustrating at times of emergency, we can store the username and the password in a textual file but again, we need our passwords to be secure. We can also use online password managers but security is always a concern, it’s good to have our passwords with us.
So let’s go ahead and create our own password manager!
Alright, before moving forward I would like to tell you that this entire project will be divided into multiple blog posts, each explaining a part of it. I will be using different AWS services and leveraging the advantages of the serverless framework. I will also use CI/CD Pipeline to show how we can integrate serverless with it and make an end-to-end real-time application.
In this blog, I will talk about encryption, AWS KMS, and dynamoDB encryption client.
In the next blog, I will take you through the Amazon dynamoDB and my data modeling journey in dynamoDB.
In the final blog, I will put all the things together and implement the whole project right from coding up to deployment by CI/CD.
The services that I am using are:
Amazon DynamoDB to store my data.
dynamodb encryption client, which is a library that provides support for cryptographic use cases.
boto3, which is a library to interact with AWS services.
AWS KMS to Manage my encryption keys.
Python as the programming language.
Serverless framework to build APIs, create resources, and deploy them on the cloud.
Let me first give a high-level overview of what we are going to do, The plan is to build an application that will encrypt our data and store it on the cloud, the data is encrypted at the client-side and it will be encrypted in transit and also at rest.
Let’s start by installing the dynamodb encryption client and boto3 using the following commands. The pre-requisite for these libraries is Python, if you don’t have it, please visit this website python.org and install it.
Type the below commands on the console
$ pip install dynamodb-encryption-sdk
$ pip install boto3
Ok, now an initial setup is done, before moving forward let’s understand a little about encryption and AWS KMS.
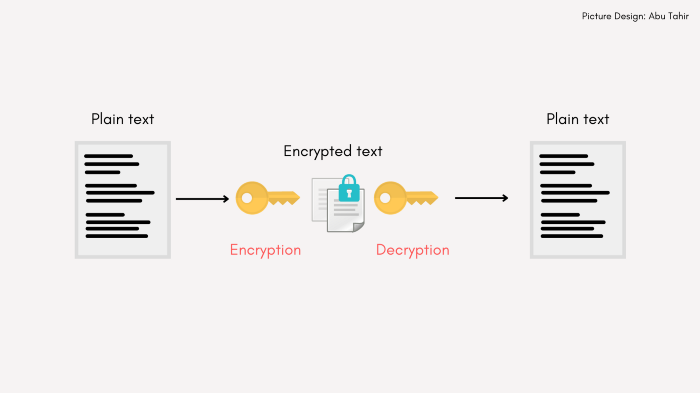
What is encryption?
Let’s say I have some sensitive information and I need to send it to another person, I can possibly send it via email, but we all know that emails aren’t the safest and the information is open to intruders. In such cases, we can encrypt our data, a process that will transform our data into a text which is not human-readable, and the person who receives this can know a particular secret code that can be used to decode this information and view it as plain-text. This secret code is called a cryptographic key.
What is AWS KMS and why should we use it?
KMS stands for Key Management Service. Whenever we deal with cryptographic use cases, we have to keep our encryption keys and their metadata safe, there can be a bunch of keys to manage, and all of these have to be present in a hardware security module(HSM) that can provide all these materials at the time of cryptographic operations. You can either use your own on-premise key store, which would require some effort and cost, and also securing it is of almost importance, or use the AWS KMS.
AWS provides you with an out-of-the-box service that is AWS KMS. This service provides the overall management of your cryptographic keys, not only does it provide the cryptographic material provider but also a bunch of other flexible operations like creating your own key store and managing your custom keys, instead of relying on encryption keys created using AWS KMS, Key rotation flexibility, etc. It also provides integration with other AWS Services like S3, EC2, etc.
With AWS KMS you can create either symmetric keys or asymmetric keys, depending on the use cases. A symmetric key is one single key that can be used for encryption as well as decryption, whereas asymmetric keys are a set of keys or a key pair that has one public, and another private key. A public key is used for encryption and a private key is used for decryption.
Creating Keys with AWS KMS
Alright, now we have an idea of what KMS is. let’s create a symmetric key that will be used to encrypt the data. To generate a key, you should first have an AWS account, if you don’t have please create one.
KMS Pricing
The free tier includes 20,000 free key management service requests per month, meaning the requests like create, delete, get, etc. But each KMS key that you create still costs one dollar per month.
If you are outside the free tier, each key you create is one dollar per month and the request’s price depends on the type of AWS service you use. For more information, you can check this out: KMS Pricing
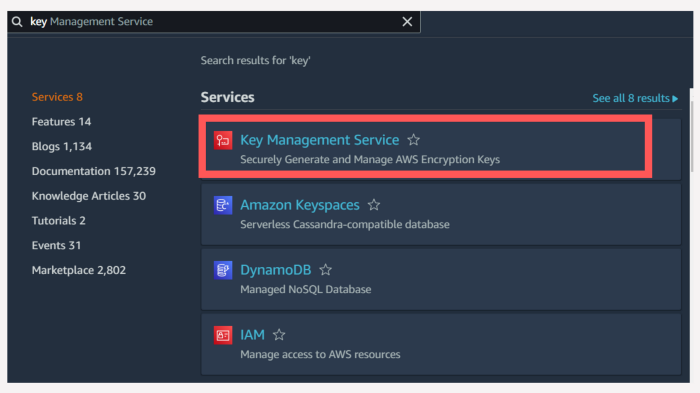
Saying this let’s move forward. Once logged in search for Key Management Service, and follow the steps below to create your key.
Click on Key Management Service.
You will be redirected to the below screen, click on create a key.

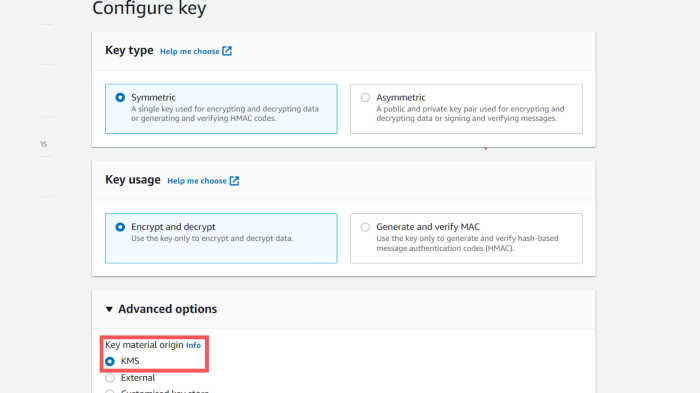
Select the defaults here. For the demonstration, let’s go with the Symmetric key. This means we will be using one single key both for encrypting our data and decrypting it, make sure the Key material is KMS in advanced options since we will be using KMS as a cryptographic material provider.
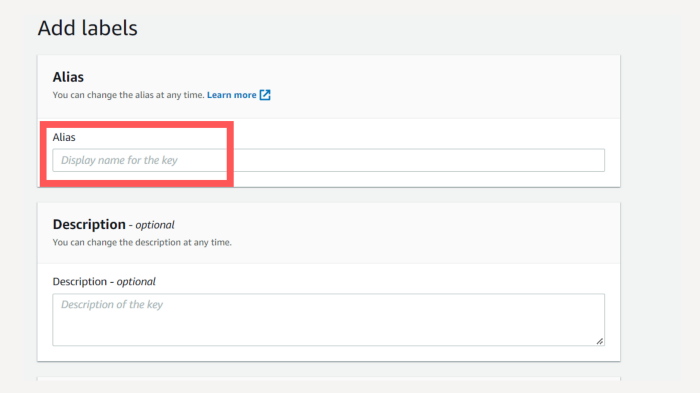
Give a name for your key.
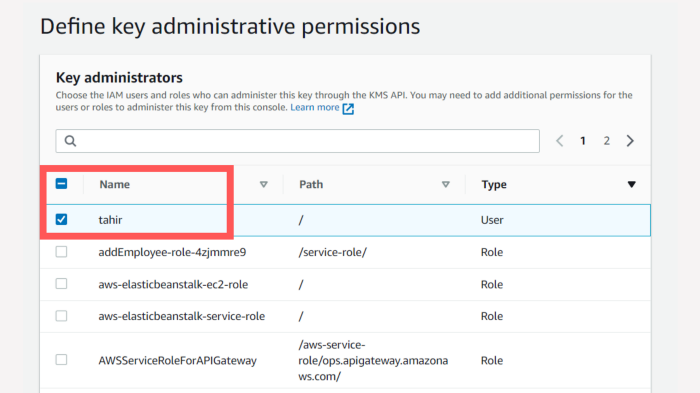
The next step is important, here you define the roles and IAM users as to who can be the administrators, In my case, I have created an IAM user with the name Tahir and provided administrative access to the same.
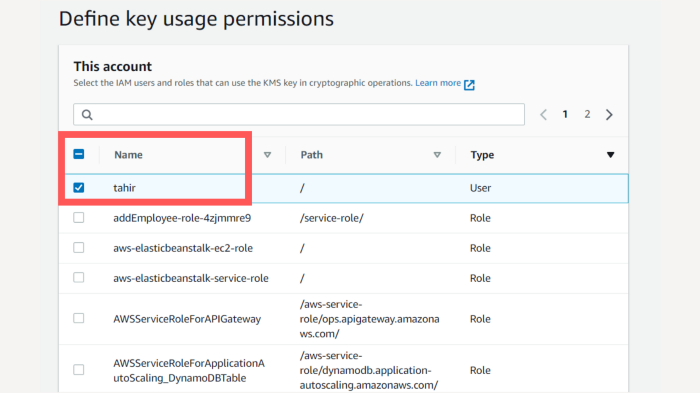
Once you have defined the administrators, you have to define as to who can use the key, again I have selected the user tahir for demonstration purposes, you can create users and define roles and access permissions accordingly.
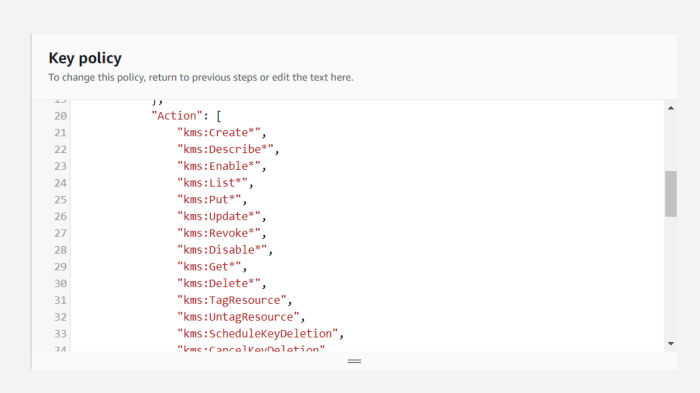
Once all the above steps are done, you will be shown this screen, here is a key policy, this policy defines all the access levels and actions, you can either leave it as it is or review and edit it based on your needs. In this example, I am leaving it as it is.
Hurray! Your key is now created, this key can now be used to encrypt the data, the key is safe and stays in the KMS itself, it’s totally encrypted and you can’t retrieve it outside AWS.
So how do we use it then?
Well, that’s where our dynamodb encryption client comes into the picture, we will instantiate the required helper classes in our code, and to use the key we will use the key id, which is a plain-text and you can use it directly.
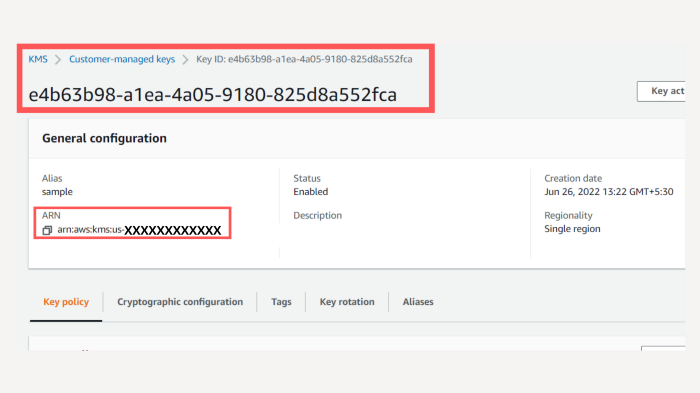
So when all the above steps are completed, you will be redirected to a screen where you can see all your keys, select the key by alias name you had previously given and you can see the below screen.
Here you can either use the key id that is highlighted or use the ARN which you can find in the general configuration below. This can now be used in our code.
So before proceeding to the implementation part, let’s understand how client-side encryption works.
How does the Client-side encryption work?
The process has 4 parts to it, plain text, crypto config, Item encryptor, and the cryptographic material provider, I will give a high-level explanation of these to keep it simple, for the in-depth explanation you can refer to the docs here, but to get started in a simpler way this much is sufficient.
Plain text: This can be the item or the object that you will store in the dynamoDB table.
Item encryptor: This is like an engine or a blender, it takes in the plain text, retrieves the keys from the cryptographic material provider, takes the crypto configurations we had defined and blends and cooks them, and provides a beautifully encrypted object that we can store in the dynamoDB, hence our data is secure in transit and also at rest!
Cryptographic material provider: This is the place where our key and its related information resides, the algorithm used for encryption, and information on generating the encryption keys and protecting them, The item encryptor interacts with the cryptographic material provider to get the necessities.
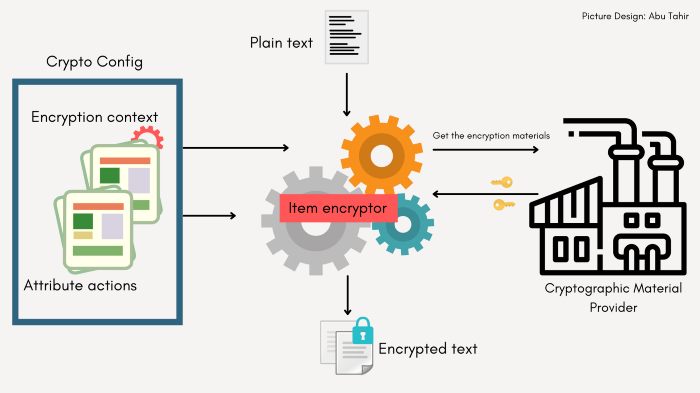
The working of dynamodb encryption client
Crypto config: In the above image, you can see there is something called crypto config, this is very important because here we specify the information regarding our table, like the table name, primary key, the attributes, etc, these all together are called encryption context. The attribute actions refer to what attributes that need to be encrypted and which need to be left normal. This information together is called Crypto config and this information is also stored in the dynamoDB table because we need to reserve this information to decrypt the item.
Alright, we now have a fair knowledge about encryption, and why we should use AWS KMS and dynamodb encryption client. In the next blog, I will take a deep dive into the dynamoDB data modeling to get a single-table design to store our data.
Conclusion
Firstly thank you for spending your valuable time on this blog, I really appreciate it.
Building simple applications like these can be very helpful for our own use, also it’s a great way to learn a lot about AWS cloud services and how to use them, just like how we learned how to use AWS KMS, concepts such as client-side encryption and encryption keys in such a short time.
Thanks for reading and have a nice day!