

Providing Controlled API access to your customers using Amazon API Gateway
Create API Keys, Provide Throttle Limits Per Customer, and much more!


In the Software development world, we often come across situations where we have to rely on third-party APIs to get our job done. We normally contact any organization and they provide us with the API key that we can use. However, they also offer plans, we have always seen that pricing depends on the plan you choose.
Well, to support all of these, AWS Provides you with an out-of-the-box service, Amazon API Gateway that helps us to achieve this in the simplest manner!
What is Amazon API Gateway?
Keeping aside the business logic here, the API Gateway is a fully managed service that provides you the ability to create your own APIs and Deploy them. It also provides you with monitoring tools, maintenance, security, etc.
APIs are nothing but a doorway to accessing the data, any business logic, and functionality from the backend services. Think of it this way, if you want to go to a store to get groceries, you take a particular path, and you travel over it and get it. This is the exact analogy with the APIs! To access the code that defines your business logic or to get the data, APIs are the medium or an interface. That’s the reason they are called Application Programming Interface.

Alright let’s get straight to the implementation of it, read more about API Gateway
API Gateway supports some native services like AWS Lambda, Amazon DynamoDB, Amazon EC2, etc. You can choose whichever you want depending on your use case, since we are discussing APIs, let’s create a lambda function that you can consider as business logic and integrate it with an API. If you don’t know what an AWS Lambda is, then here’s a simple definition of it, AWS Lambda is a service that lets you write, manage, maintain and host your code without having to use any servers, it’s basically a serverless compute service. You can read more about AWS Lambda Here.
Let’s Create an AWS Lambda function
Creating a lambda function in the AWS console is pretty simple and straightforward, follow the steps below:
Open the AWS dashboard and search lambda
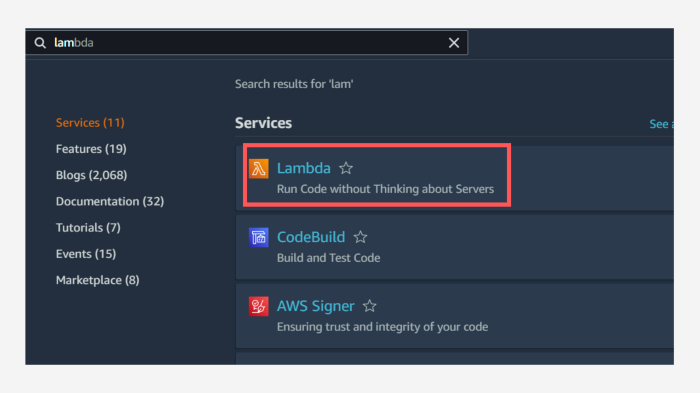
Image 1.0
You can see the below screen now
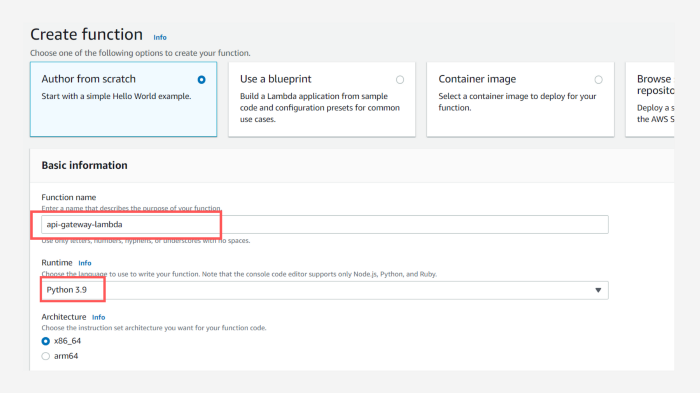
Image 1.1
Here, give your lambda function a name, I am naming it as api-gateway-lambda . Choose the runtime from the dropdown menu, I have chosen Python, if you are into another programming language, feel free to choose it, leave the rest of the things to default and click Create function.
That’s it! your lambda function with a minimal code will be created and automatically deployed, you will now see the below screen.

Image 1.2
And this is how the coding console will look like, for me it says changes not deployed because I added a print statement in the code, if you make any changes, make sure you click the Deploy button. You can also test, click on Test and follow the instructions given on the screen, it’s pretty straightforward.
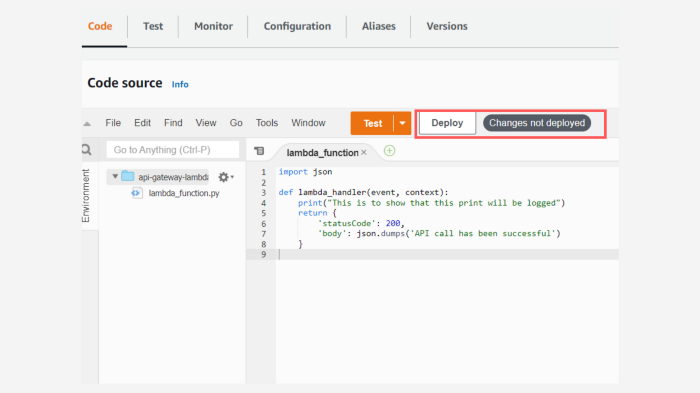
Image 1.3
The next step is to create an API and Integrate this lambda function to it. let’s do it.
How to Create an API using Amazon API Gateway?
In your AWS Dashboard, search for API Gateway
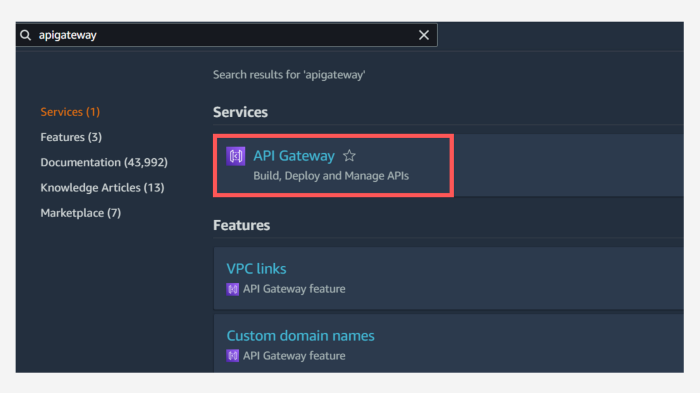
Image 2.0
You will now see the below screen, I have only shown two options, you will see multiple options like HTTP API, REST API (Private), etc. Choose REST API, because the HTTP API is very basic and gives minimal functionality, since we need features like API Keys and Throttling limits, we need to choose REST API and click on Build.

Image 2.1
Once you click on Build, you will see the following screen. Provide the API name and description. In the Endpoint type, you can let it be default or choose edge optimized or make it private.
What is meant by Edge Optimized? The request to Edge Optimized APIs are routed through the CloudFront network, which means if you have your clients all over the world and when they try to access your API, they will be routed to the nearest edge location on CloudFront and from there they are routed to the API Gateway hence latency will be reduced.
Once you have selected the preferable options, click on Create API
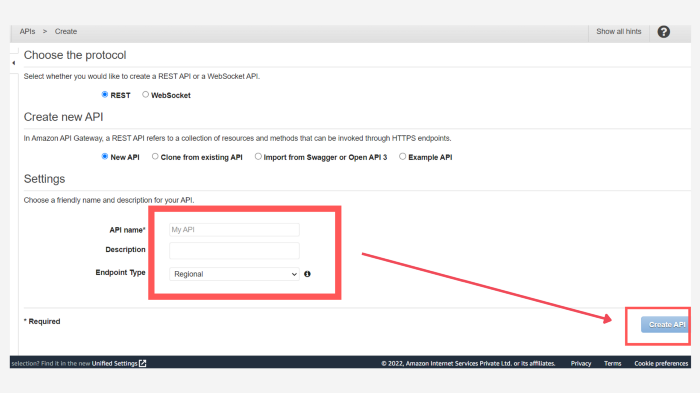
Image 2.2
You will now see the below screen, in this image I have added two screenshots, the first one is the screen that you see when you click on create. Now we need to setup the API, so click on Create Resource.
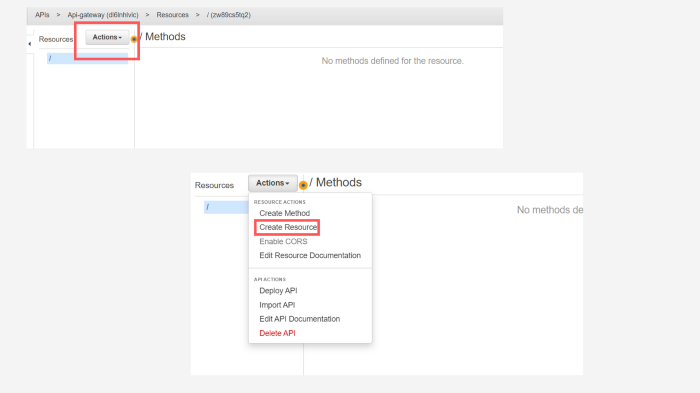
Image 2.3
Once you click on Create Resource, you will see the below screen, here you can specify the name for your path, this is the endpoint that will be used when requesting any data. If you want you can enable CORS, it basically handles which sites can send the request to your API. Review and click on Create Resource.
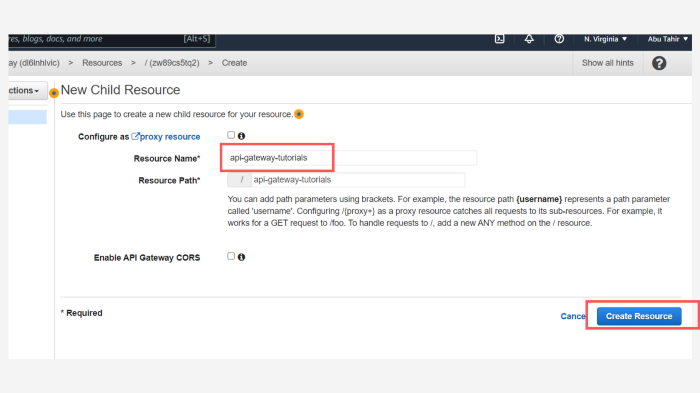
Image 2.4
Now your resource will be created, if you see the name /api-gateway-tutorials is the resource, click on it to select it and now click on Actions dropdown again and select Create Method, you can choose whatever Method you need, I have selected POST , click on the check button.
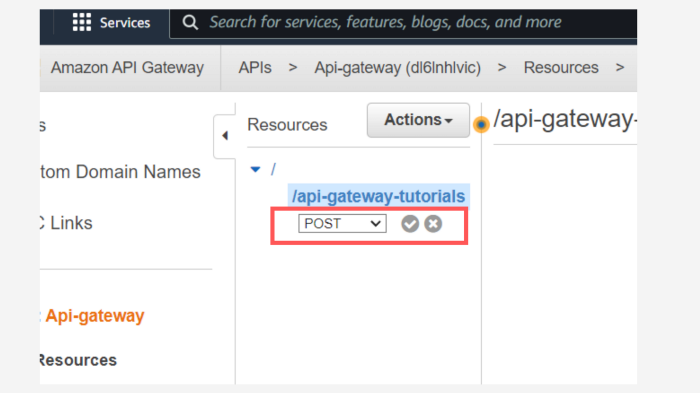
Image 2.5
Once your method is created, you can see the below screen. This step is to integrate the lambda function that we had created to the API we just created, select Integration type as Lambda Function, check the Use Lambda Proxy Integration, and make sure you select it because, this will add the additional parameters like headers, method, resource, etc. That will be required by the Lambda function to make it an API. Select the Region where your Lambda is present and select the function, see the highlighted sections in the below screen. Click on Save.
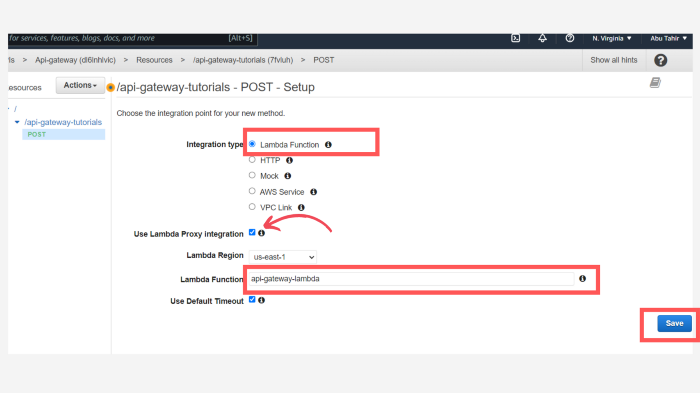
Image 2.6
That’s it! Your API is now ready, we now need to deploy it and the world can use it. Click on Actions dropdown and select Deploy API.
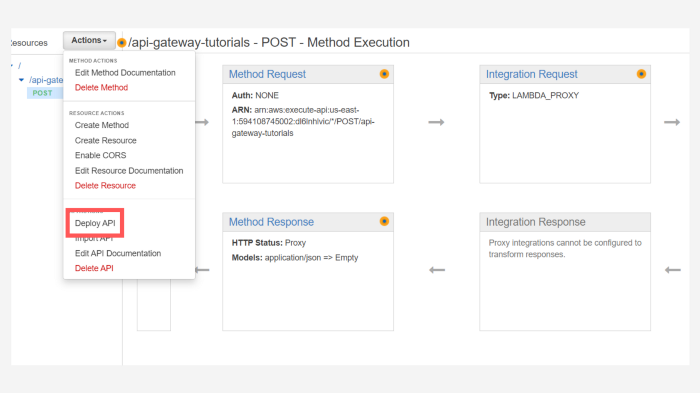
Image 2.7
Once you click it, you will see the below screen, here choose the Deployment Stage, since you don’t have a stage now, select [New Stage]. I have given the name as prod, provide the necessary descriptions, they are optional. Click on Deploy.
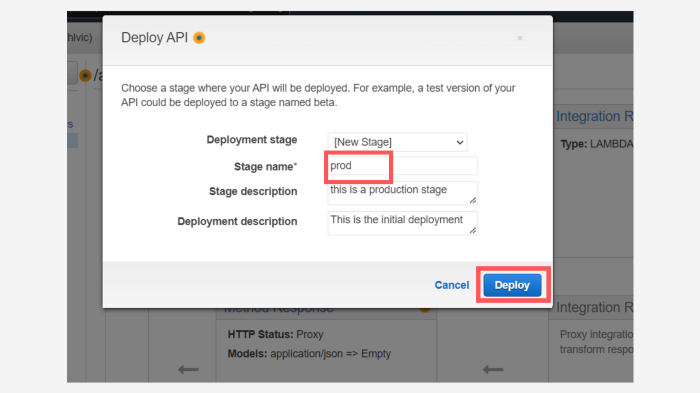
Image 2.8
Your API is now Deployed! You can view the invoke URL, to test it, you can use Postman, if you don’t know what Postman is, then it is just an application that lets you test your API requests, there are a bunch of options in it, Check out this video to know how it works.
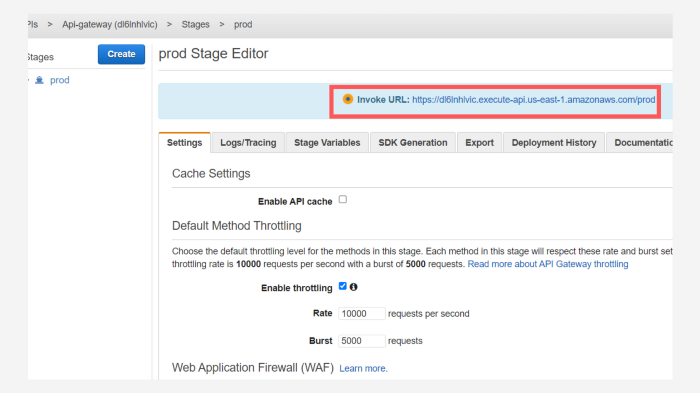
Image 2.8
Alright, the below screen is the Postman app, create a new HTTP request, make sure you select the method that your API is deployed as, paste the Invoke URL in the request bar, and make sure you add the endpoint that is /api-gateway-tutorials you can see that we have got a response! Awesome!
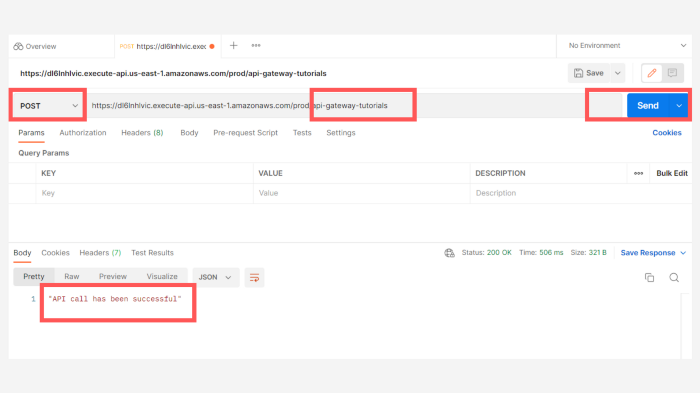
Image 2.8
How to create an API Key?
Alright, we have successfully created an API, but this API is available to the entire world, it’s basically an Open API. We can have multiple use cases where we need to keep it private to our organization but also, but we need to share them if required. The other platforms may also need your API.
If you are providing the API as a service, you will have to create the API keys for your customers. You can have your own plans created like Free, Basic, Premium, etc. The customers will have different kinds of advantages over the plans they select, how can we do that?
Well! It’s pretty simple!
All you have to do is select API Keys from the left navbar, you will see the below screen. Click on Actions and choose to Create API Key, Give your API Key a name, you can choose to Auto-Generate, give the description, and Save.
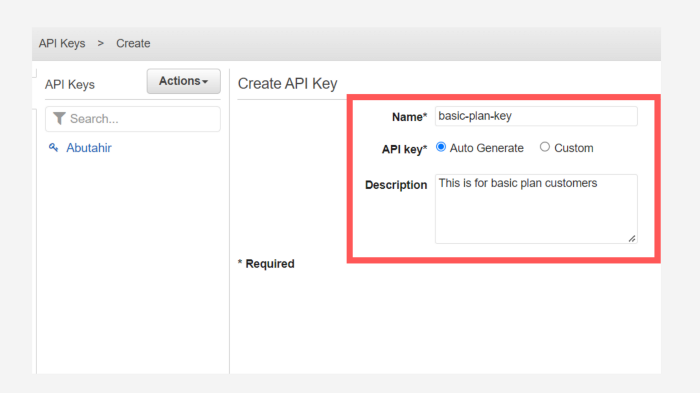
Image 2.9
Once you click on Save, you will see the below screen. Here, You need to add Usage Plan, also notice that you can see the API Key here, you need to click on Show.
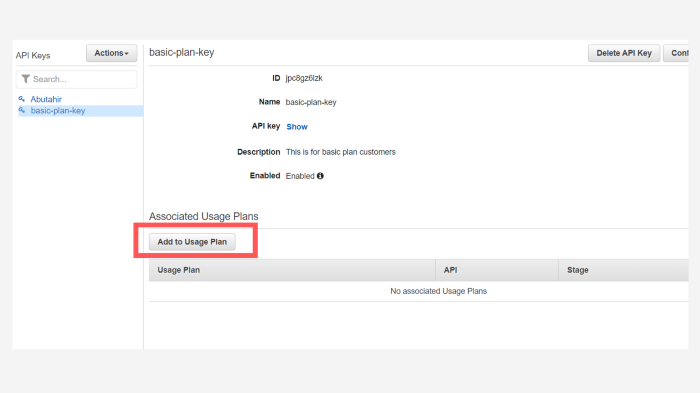
Image 2.10
How to Create a Usage plan?
It’s very straightforward, all you need to do is select Usage Plans from the left navbar and click on Create. You can give a name to your plan, the most important thing to notice here is that we need to Enable Throttling and give it a limit, you can give a low limit to free customers and a high limit to premium customers, similarly specify the limit for Burst, which means how many concurrent requests you want your API to handle.
Also specify the Quota, let’s say my customer can send a million requests to my API and once it is completed, the customer needs to renew the plan by Paying!
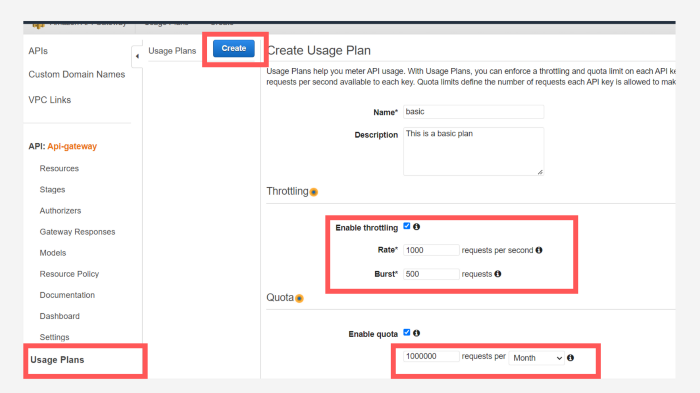
Image 2.11
Click Next and you will be shown the below screen, where you have to associate your API with the plan, also specify the stage. Here my API name is Api-gateway, I selected it. Once it is done, click on next.
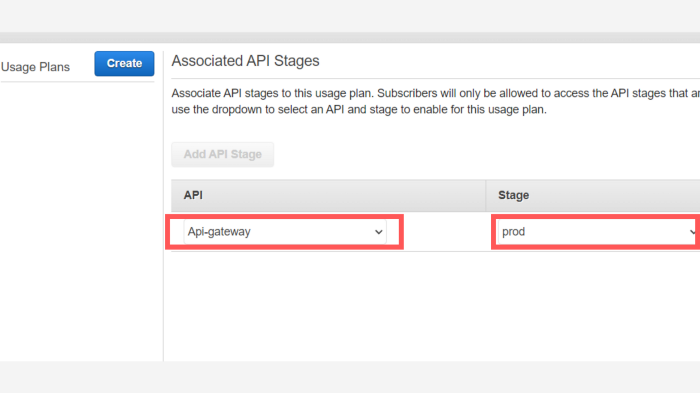
Image 2.11
You will now be shown this below screen where you have to add your API Key to a specify plan, now this is how you handle the users, you provide them with keys that specifies their plan!
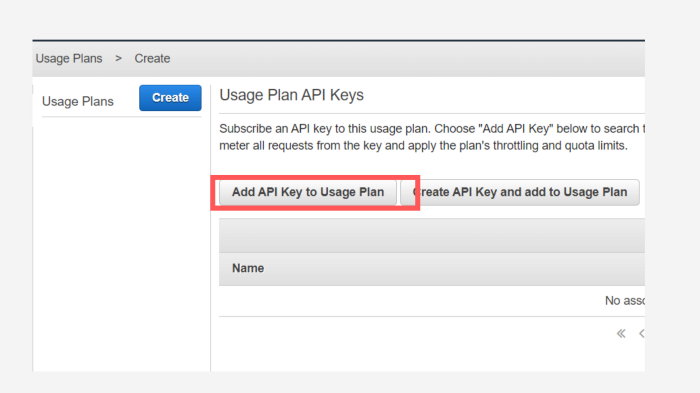
Image 2.12
Alright! That’s the basic setup we needed, all we have to do now is enable this Key to our API and we are done! Select API in the left navbar and click on the method. You will see the Image 2.7 screen shown , where you can see 4 tiles. Click on Method Request and you will see the below screen, here in the option API Key Required, select the dropdown and choose true. Save it
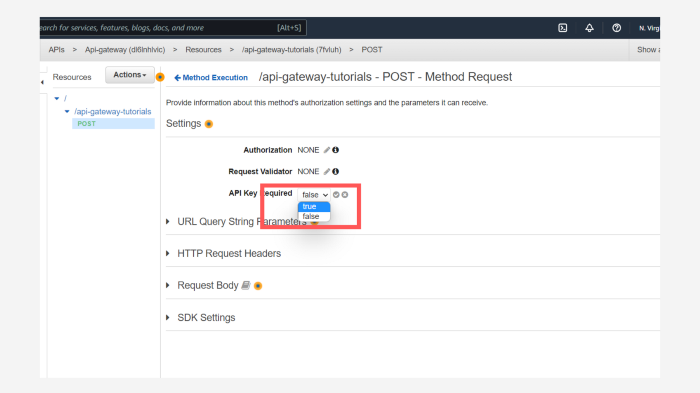
Image 2.13
That’s it! we have now completed the whole setup. Remember to Deploy! Click on Actions dropdown and deploy it.
Now if you run the Postman request again, you will see that the API returned Forbidden! We have now secured our API.
NOTE: Even after the deployment, it might take a while for changes to reflect, and you might get normal output. After a minute it will be up and running
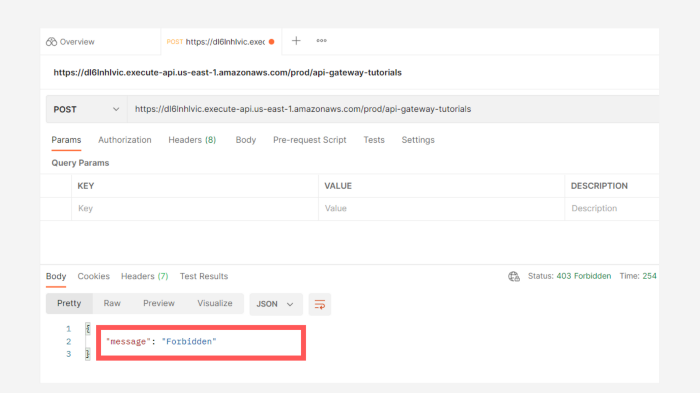
Image 2.14
Now, all we need to do is copy the key from the console and provide it in headers in Postman. type x-api-key as the param name and provide the value that you got. Click on save and run it!
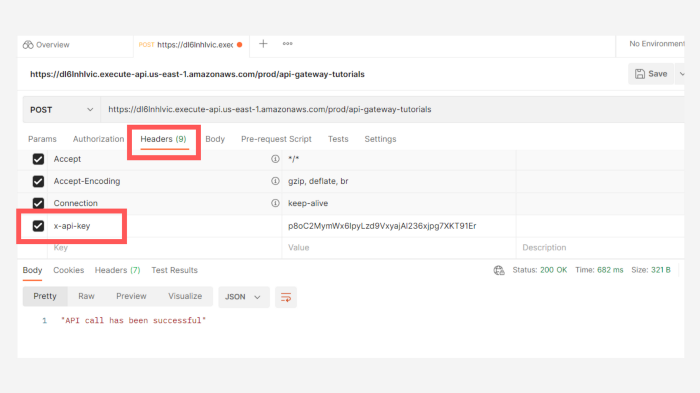
Image 2.15
Conclusion
First of all, thank you for spending your valuable time on this article, I really appreciate it. I hope you learned from it, Providing security to the APIs is very essential in the software world as it interacts with most of your data and business logic.